There is another way to do the importing Virtualbox VDI to Proxmox VE 3.5-8.
Similar to my previous post.
Step 1, Copy the VDI into the Proxmox VE host
No need to covert the VDI file to RAW format. Just copy the vdi file into the local folder. For me, I will just put it at /root/testing.vdi
Step 2, Create a new VM in Proxmox
On the “OS” tab, choose “Do not use any media”
On the “Hard Disk” tab, choose “local-lvm”, as storage, Disk size is any size you want, for example, 8GB. Format, choose “Raw disk image (raw)”, On CPU and Memory, choose the same as the Virtualbox settings.
Confirm to create the new VM.
Step 3, Detach and Remove the Hard Disk
Say my VM ID is 109, choose Virtual Machine 109, Hardware, Hard Disk, choose “Detach” button.
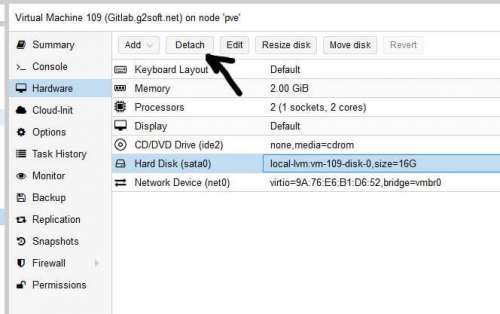
At this point, the hard disk will be listed as “Unused Disk.” It still exists but is not attached to the system. To destroy it completely, select the Unused Disk and click Remove again; and confirm when prompted.
Step 4, Import the VDI to VM 109
I want the VM disk located in the local-lvm as all my other VMs.
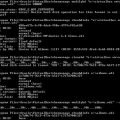
Enter the following command inside of the SSH window of the host.
qm importdisk 109 /root/testing.vdi local-lvm
Above, 109 is the VM ID, /root/testing.vdi is the disk image of Virtualbox VM disk, local-lvm is the location of Storage.
It takes minutes to hours, depends on the size of the vdi file, and also the CPU.
After it is finished. Go back to the Proxmox VE web GUI.
Step 5, Attache the Hard Disk and start it
On the Virtual Machine 109, Hardware, I can see the unused Hard Disk located here. Double click it to add the Unused Disk.
Choose SATA for my machine. It will be attached to the VM.
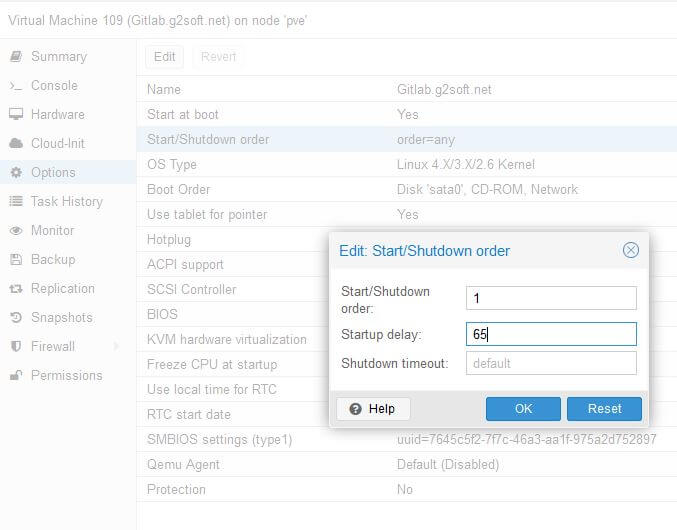
On the Options tab, double click Boot Order to choose boot device 1 to be Disk ‘sata0’.
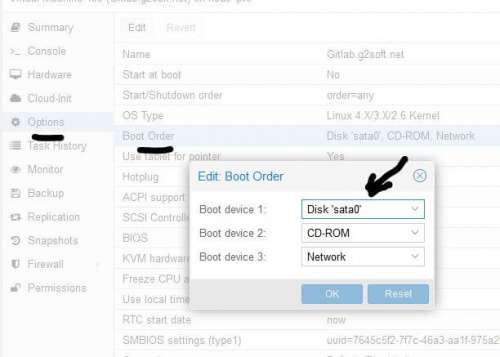
Then, click “Start” button to start the VM 109.
For my situation, I still need to modify the network interface to make sure it can retrieve the DHCP settings.
It is a little bit easier for someone. Because the VDI file may be smaller than RAW format file. So save more time when transferring the file from the Virtualbox Host to Proxmox Host.
Related posts:
 Move Virtualbox VDI to Proxmox VE System
 VirtualBox 4.1.22 and VirtualBox 4.2 released
 How to enable the VM auto-boot in Proxmox VE
 How to upgrade Proxmox Virtual Environment 5.4.x
 Prepare CentOS 6.3 within VirtualBox
 VirtualBox resize hard disk error: VBOX_E_NOT_SUPPORTED
Thanks a lot, that worked wonderfully 😀
Fun fact: The machine I moved with linux kernel 3.16 already supported virtio for network and hard drive, so no hardware emulation any more \o/
Thank you so much!
This is the best, simplest procedure I have found so far, and I love the ability to skip the steps of manually converting the file to RAW. I’m not sure yet, but it looks like the converter automatically recognized the .vdi file and converted it into qcow without manual intervention.
After using scp to copy files from within each instance at first, I installed WinSCP onto my Windows 10 workstation, which helped move the files between servers, and also store them on shared Windows volumes for backup.
Your method was useful not only for converting VBox .vdi machines, but provided clues to ease moving CTs and VMs from server to server.
Regardless, after I followed your guide to move a Windows 10 Pro instance from VBox to Proxmox, I couldn’t believe that it simply booted-up and ran. All I had to do was install the QEMU drivers and guest agent, set the Proxmox graphics adapter to VirtIO (QEMU drivers must be installed on the Windows guest for VirtIO GPU to work, or else Windows crashes on boot), and the instance was complete!
Thanks again, I hope you become very wealthy!
It is not working for my setup with Proxmox 7.1.
Should it work?
I get “BdsDxe: Failed to load Boot0003 “UEFI QEMU QEMU HARDDISK ” from PciRoot … not Found”
I imported a VDI that was dynamic in the VM, meaning it was increasing its size according to its actual space.
When I imported the disk with “qm importdisk” the terminal output said it transferred 495 GB. But the size of the disk is more like 40GB.
The actual change on the proxmox local was also 40GB. And it was quite fast.
So maybe this was okay.
When I attached the disk I chose both, SATA first and SCSI the second time I tried. I had my proxmox VM setup with SCSI (maybe this is wrong?).
I also have to say that I setup my proxmox VM with OVMF (UEFI) and q35 machine.
Wow, I did it. Reset the proxmox VM to i440fx, SeaBIOS and the disk to SATA and now it boots. Still seems to crash upon boot but at least the disk is found and working.
Thanks Friend, It worked.
Its a great help 🙂
thanks! it worked!
now I have the same problem about network interface that doesnt get any ip
how do you solve it?
UPDATE: you solved in the previous post! thanks again!
I am so happy it helps you.