Set up Backblaze B2 storage with existing Mastodon.
Here is for my record, not as a guide or reference. If you follow it on your Mastodon instance, take a risk.
I use the Backblaze B2 storage after a few days of Installation of the Mastodon Instance. I already have some posts on it.
Sign up to Backblaze
Go to the official site of Backblaze.
Click the “Start Free” button on the up-right corner. There are two main products. Select B2 Cloud Storage by clicking the “Try for Free” button.

Before filling out the signup form, choose Region first. Pick the one close to your target users. Anyway, I chose US West, because of my home. Please note that the region can not change later.
A verification email will be sent to you. Click the link to activate the account.
Create a Bucket
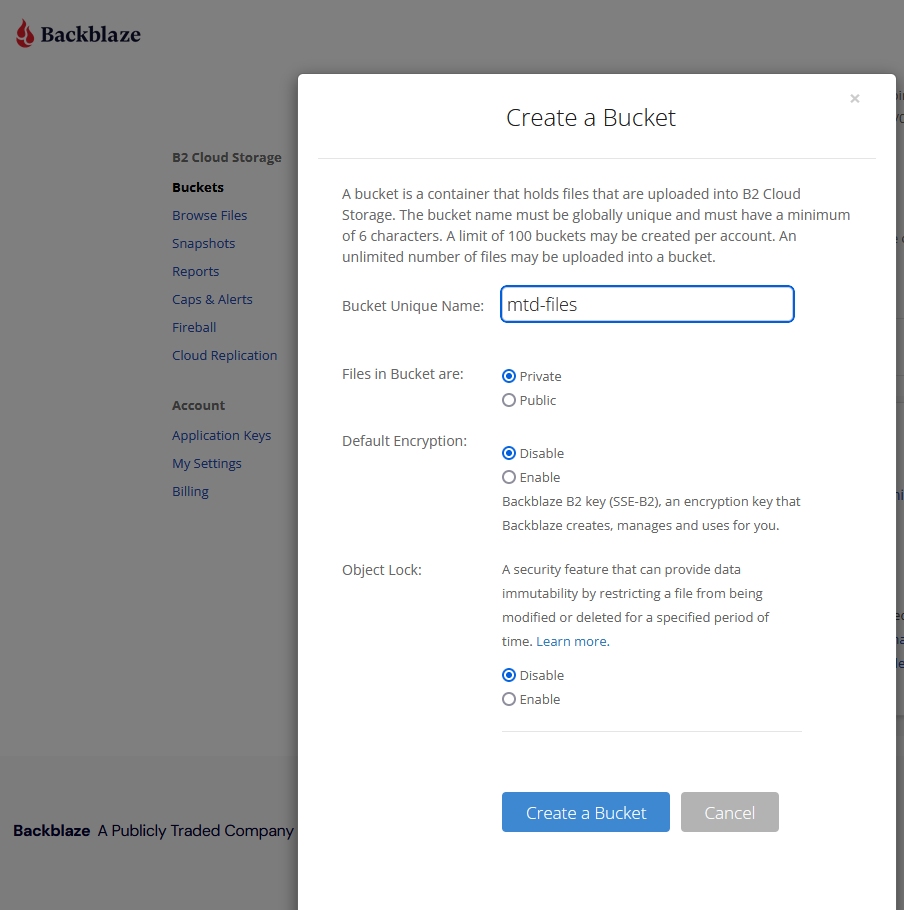
Go to Buckets -> Create Bucket.
Enter the name of the new bucket. The name will be used later in the URL. It is kind of important. For example, I named it “mtd-files“.
For the rest of the options,
- Files in Bucket: Public
- Encryption: Disable
- object Lock: Disable
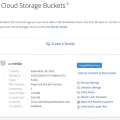
Now, you have a new bucket. Look at the important information about it.
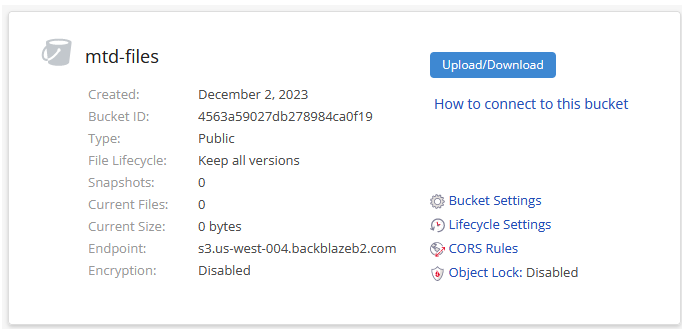
Two important points to keep in mind.
Name of bucket: mtd-files
Endpoint: s3.us-west-004.backblazeb2.com
You need them later.
Create an API Key
The last important step in the Backblaze account is creating an Application key. On the menu, choose ‘Application Keys’ and scroll down to ‘Add a New Application Key’.
Give the name of the key, I give the name “mtd-files-rw”. From the pull-down list of buckets, select the new bucket “mtd-files”. Of course, Read and Write permission for it.
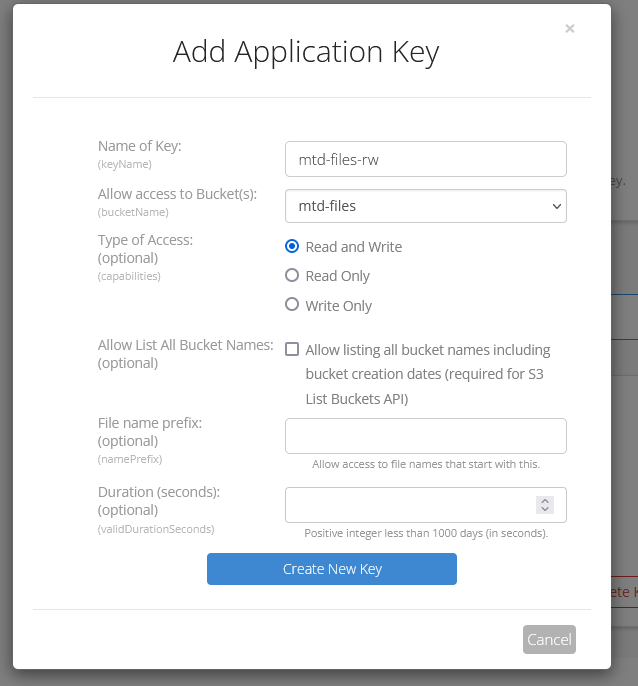
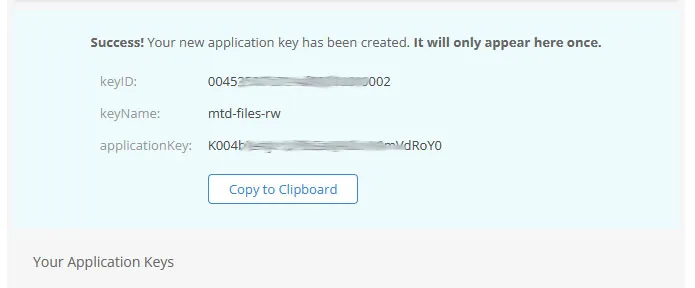
Click the blue “Create New Key” button. It will show you the keyID and applicationKey. They so important, just copy and paste them to your local note. The applicationKey just shows one time.
For now, we are done with the Backblaze part.
Configure Mastodon
I have a Mastodon instance running. So go to VPS, and do the following.
SSH to the VPS
sudo nano /home/mastodon/live/.env.production
Add the S3 to the end of the file.
S3_ENABLED=true
S3_PROTOCOL=https
S3_ENDPOINT=https://s3.us-west-004.backblazeb2.com
S3_HOSTNAME=s3.us-west-004.backblazeb2.com
S3_BUCKET=mtd-files
AWS_ACCESS_KEY_ID=XXXXXXXXXXXXXXXXXXXX
AWS_SECRET_ACCESS_KEY=XXXXXXXXXXXXXXXXXXXXXXXXXXXXXXXXXXXXXXXX
AWS_ACCESS_KEY_ID = keyID
AWS_SECRET_ACCESS_KEY = applicationKey
Save it and quit.
To make it effective, need to restart Mastodon.
Restart Background workers:
systemctl restart mastodon-sidekiq
Then, reload the web process:
systemctl reload mastodon-web
Completed the above jobs, any new picture uploaded will be severed from the B2 storage.
How about the old media files on the local storage or VPS?
Here is the tool for this task.
First, install AWS Cli tool. I am on Ubuntu 22.04.
sudo apt install python3-pip
pip install awscli
Now the AWS Cli tool is installed at ~/.local/bin/ folder.
:~/.local/bin$ ./aws --version
aws-cli/1.31.0 Python/3.10.12 Linux/5.15.0-1048-oracle botocore/1.33.0
Configuring AWS-Cli:
~/.local/bin/aws configure
AWS Access Key ID [None]: keyID
AWS Secret Access Key [None]: applicationKey
Default region name [None]:
Default output format [None]:
When done with the configuration. Got to the Mastodon live folder
cd /home/mastodon/live/
~/.local/bin/aws sync public/system/ s3://mtd-files  --endpoint-url=https://s3.us-west-004.backblazeb2.com
Then it starts to sync files to Backblaze B2 storage, the mtd-files bucket. How long it takes, very depends on the number of files.
If you have more than 10GB files( over the free quote), you’d better enter the billing information in the first place. The Caps & Alerts has a default Caps on Daily Storage, 10GB free space. Backblaze will inform you when it reaches 75% and 100%. When 100%, you are not allowed to put files into it.
When it finished. you can remove the local files under public/system.
I just ran the command, sudo rm -rf /home/mastodon/live/public/system/
Check how much space you took on Backblaze B2.