Here is the simple way to upgrade the old 250GB NVMe M.2 SSD to a new 1TB NVMe M.2 SSD on my desktop PC. The problem is that only one M.2 slot on the Motherboard, ASUS Prime B450M-A II.
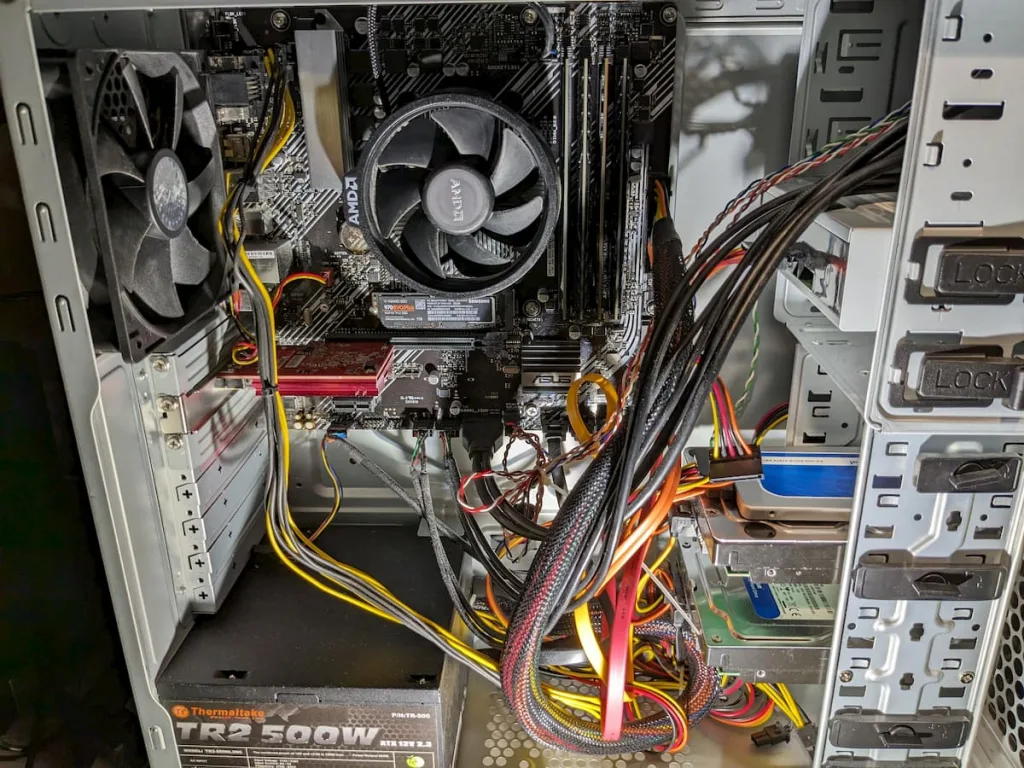
Before upgrading, I had four storage devices installed inside the case.
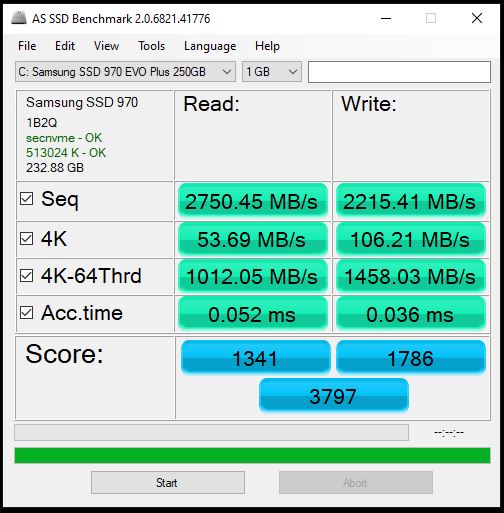
- Samsung SSD 970 EVO Plus 250GB – System and boot
- WDC 1TB
- WDC 2TB
- Crucial BX200 240GB SSD
How to do it without reinstalling the OS and all the applications? And also I don’t want to buy an M.2 – PCIe adapter or an M.2 USB enclosure. For just one-time use, it is a kind of a waste of money.
OK. I got it. The data on Crucial 240GB SSD is not important. I am going to use it as a bridge.
Step 1, Transfer everything on Samsung SSD 970 EVO Plus 250GB to Crucial BX200 240GB.
Download the Acronis True Image for Crucial download
You can find the download link at webpage of https://www.crucial.com/support/ssd-support
This special edition of Acronis True Image only works when you have a Crucial SSD installed in the system.
Install the software, Acronis True Image.
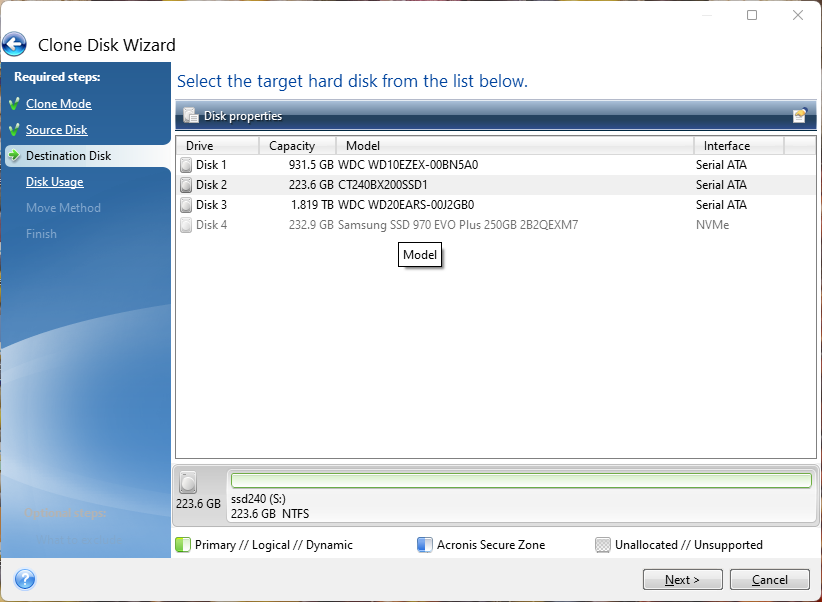
Look, The source Disk is a Samsung 970 250GB. The destination Disk is CT240BX200.
The clone process is about five minutes.
Instead of rebooting, I turn off the computer when the clone is done.
Step 2, Replace the Samsung disk
Disconnect the power cord. Press the power button to release the rest of the electricity.
Open the case, unscrew the M.2 screw.
Take down the 250GB disk.
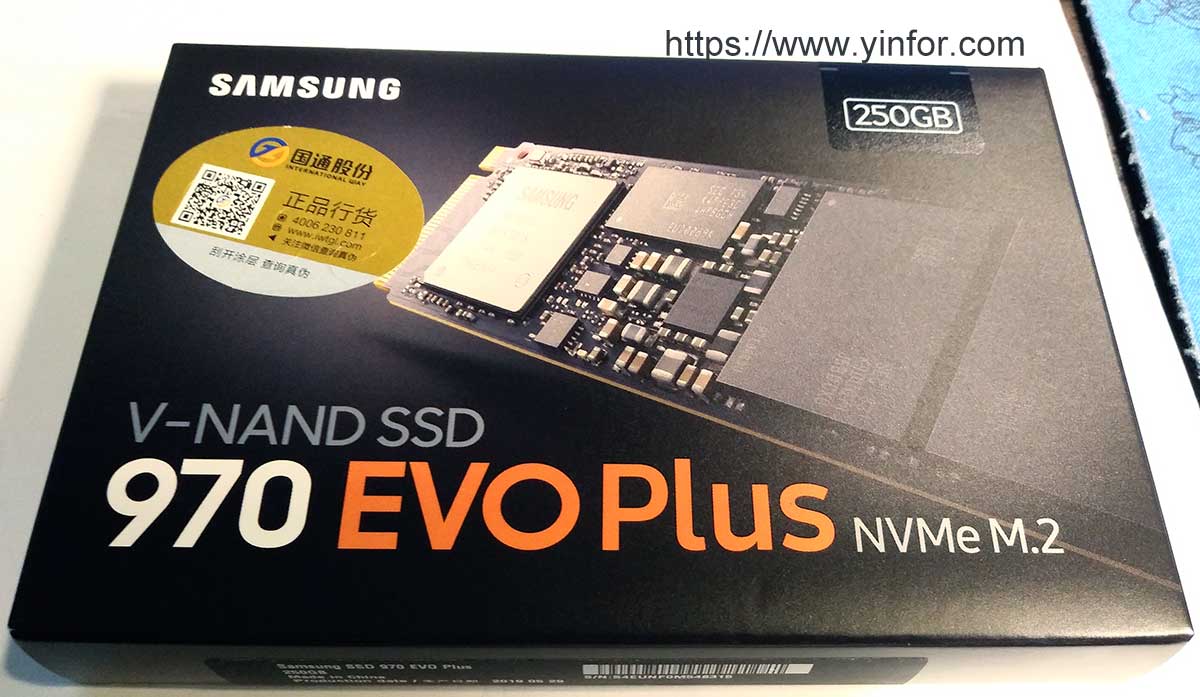
Install the new Samsung 970 EVO Plus 1TB.
Step 3, Boot the PC
Reconnect the power cord. Press the power button to turn on it.
Now, the system is booted from the Crucial SSD.
Step 4, Clone the system to the New NVMe SSD
I can still use the same software, Acronis True Image. Someone use Samsung’s software, Data Migration, to clone the disk.
Almost same as the Step 1 above. Use Crucial SSD as the source disk, and Samsung 970 1TB as the destination disk.
When done, reboot.
Wipe out the Crucial 240GB disk.
Notes:
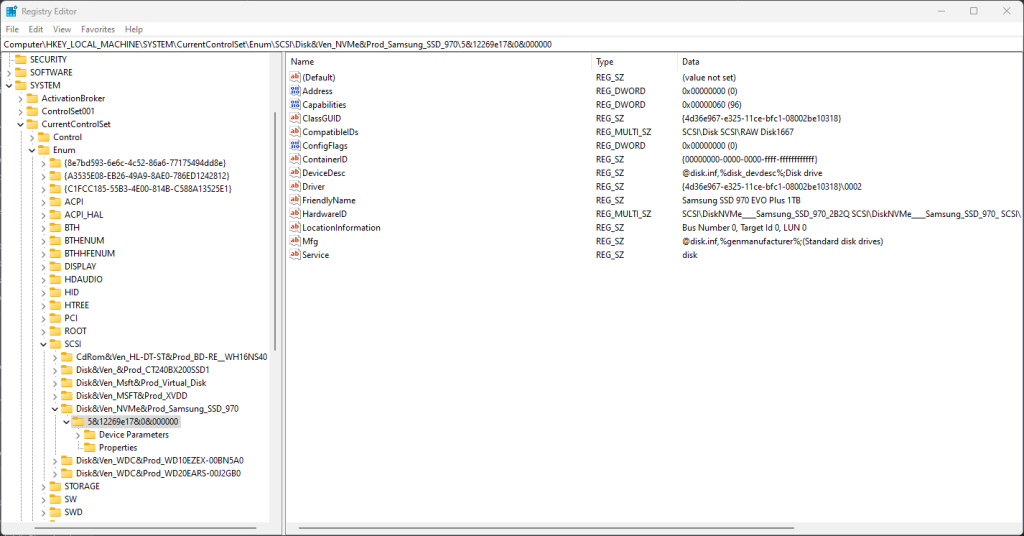
Even if everything is OK, the new disk is shown as 250GB in some applications. I have to update the display name manually in the Registry
- Start a registry editor (e.g., regedit.exe).
- Navigate to the HKEY_LOCAL_MACHINE\SYSTEM\CurrentControlSet\Enum\SCSI registry.
- There is a list of the devices.
- Located the Disk of the Samsung 970.
- Find the key of FriendlyName, and double-click it to edit the content to Samsung SSD 970 EVO Plus 1TB
- Close the registry editor.
- Restart the computer for the change to take effect.
After the upgrade, the system driver is big enough for a while. I don’t need to worry about it.