
Here is a record for reference. I bought a set of kitchen thermometers. 3 piece. One of them is a digital thermometer, which needs to be calibrated. I post this manual for future use.

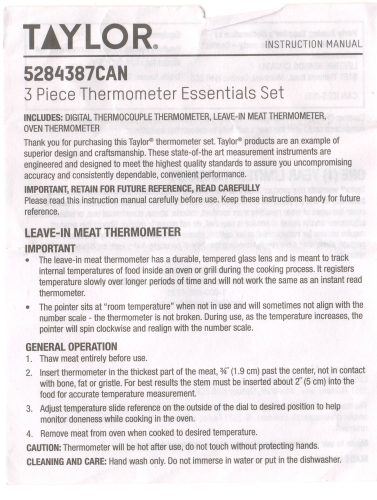
Model 5284387CAN
- Accurate, stable internal food temperatures reached in less than 6 seconds
- Ultra-fine, 0.07˝ (1.7 mm) probe tip for minimal visual impact to foods
- Tempered, safety glass lens is safe to leave in the oven or grill during cooking
- Ideal for use with turkey and larger roasts
- Ideal reference temperatures for warm, bake, roast

TAYLOR
5284387CAN
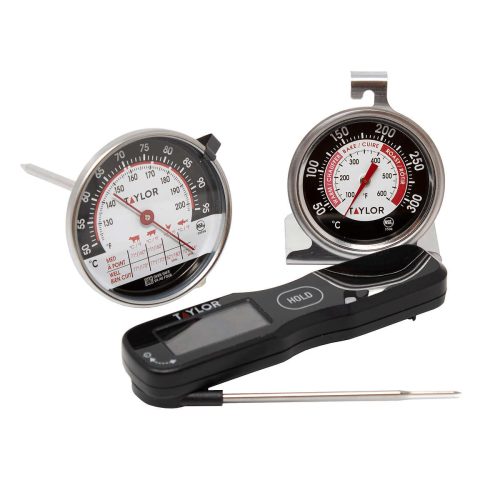
3 Piece Thermometer Essentials Set
INSTRUCTION MANUAL
INCLUDES: DIGITAL THERMOCOUPLE THERMOMETER, LEAVE-IN MEAT THERMOMETER, OVEN THERMOMETER
Thank you for purchasing this Taylor@ thermometer set.Taylor@ products are an example of superior design and craftsmanship. These state-of-the art measurement instruments are engineered and designed to meet the highest quality standards to assure you uncompromising accuracy and consistently dependable, convenient performance.
IMPORTANT, RETAIN FOR FUTURE REFERENCE, READ CAREFULLY
Please read this instruction manual carefully before use. Keep these instructions handy for future reference.
LEAVE-IN MEAT THERMOMETER
- IMPORTANT
The leave-in meat thermometer has a durable, tempered glass lens and is meant to track internal temperatures of food inside an oven or grill during the cooking process. It registers temperature slowly over longer periods of time and will not work the same as an instant read thermometer. - The pointer sits at “room temperature” when not in use and will sometimes not align with the number scale – the thermometer is not broken. During use, as the temperature increases, the pointer will spin clockwise and realign with the number scale.
GENERAL OPERATION
- Thaw meat entirely before use.
- Insert thermometer in the thickest part of the meat, 3/4″ (1.9 cm) past the center, not in contact with bone, fat or gristle. For best results the stem must be inserted about Z’ (5 cm) into the food for accurate temperature measurement.
- Adjust temperature slide reference on the outside of the dial to desired position to help monitor doneness while cooking in the oven.
- Remove meat from oven when cooked to desired temperature.
CAUTION: Thermometer will be hot after use, do not touch without protecting hands.
CLEANING AND CARE: Hand wash only. Do not immerse in water or put in the dishwasher.

OVEN THERMOMETER
GENERAL OPERATION
Hang or stand thermometer in the oven during cooking to ensure that roasted or baked items are cooked evenly. For best results, place near the back of the oven away from any convection fans or lights.
CAUTION: Thermometer will be hot after use, do not touch without protecting hands. Always remove the thermometer before using the self-cleaning setting on the oven. The high temperatures will damage the thermometen
CLEANING AND CARE: Hand wash only. Do not immerse in water or put in the dishwasher.
DIGITAL THERMOCOUPLE THERMOMETER
BATTERY INFORMATION
The digital thermometer operates on two (2) AAA Duracell batteries (included). They are uninstalled during shipment to preserve battery life during shipping. The batteries are located in a blister pocket visible from the front of the package. Remove the batteries from the packaging and take them out of the plastic wrapping before moving to the next step. To install or replace batteries:
- With the probe stem in the closed position use a small Philips head screwdriver to loosen the four (4) screws on the compartment cover. For safety, the screws will not come out of the door. Remove the cover and set aside.
- Insert the two (2) AAA batteries according to the polarity (+/-) symbols inside the compartment. The batteries stack end to end in the same direction.
- Replace the battery compartment cover and tighten the four screws enough for the door to be flush with the outside surface. This ensures a water resistant seal.
- To remove old batteries: Use your fingernail or a small tool such as a pen or screwdriver to gently lift the first battery from the compartment. The second battery can be removed by gently tapping the back of the thermometer to move the battery into the open compartment if it did not slide freely after removing the first battery.
NOTE: Change the batteries when the display becomes dim or when LCD shows “LO”; this gives the indication of low batteries.


GENERAL OPERATION
(Remove plastic cling material over LCD readout before proceeding!)
- Sterilize the metal probe by inserting it into an appropriate solution such as boiling water for several minutes.
- The unit will turn on automatically when the probe is unfolded.
- The thermometer is factory set to read in Fahrenheit. To switch to Celsius follow the instructions to remove the battery door. The switch is inside the compartment. Move it to the C location and the thermometer will reset to Celsius.
- To test the internal temperature of the food, unfold the stem and insert into the thickest part of the food. Do not come in contact with bone, fat or gristle, as these areas will not provide accurate temperature readings. Take care when moving the probe into position to avoid injury or damage. DO NOT LEAVE THE THERMOMETER IN THE OVEN WHILE COOKING, AND DO NOT TOUCH THE HOT PROBE WITH BARE HANDS.
- The current internal temperature of the food appears on the LCD screen.
- HOLD Feature: When the digital display has stabilized and the red backlight is still activated press the “HOLD” button and the temperature will be locked for viewing after removing the stem from the food [the word “HOLD” will appear). Press again to release and return to active monitoring.
- Backlight Feature: A red backlight will illuminate for approximately 60 seconds when the probe is unfolded to turn on the thermometer. Manually turn on the backlight for additional time by pressing the “HOLD” button.
- Clean the thermometer casing by hand. Do not immerse the thermometer in water. Be sure to sanitize the stem before inserting it into another product.
- The display may dim during active temperature monitoring to conserve battery power even though the thermometer is still recording temperature updates. When you are finished using the thermometer remember to close the probe completely to turn the thermometer power off.
CALIBRATION
Digital thermometers that have thermocouple sensors seldom require recalibration or testing. If you believe your thermometer may have been dropped or mishandled and requires recalibrating at 32°F (0°C) use the below instructions.
- Fill a container with crushed or chipped ice.
- Add water slowly until it overflows.
- Add more ice until it is packed tightly to the bottom of the container, allowing excess water to overflow.
- Insert the stem of the thermometer at least Z’ (5 cm) into the container and allow it to stabilize for 5 minutes. NOTE: It is important that the tip of the thermometer not touch the bottom of the container.
- If the temperature reading is 32°F (0°C), the thermometer is accurately calibrated.
- If it is necessary to adjust the thermometer, press and hold the “Hold” button for 3 seconds.
- The display will show “CALu” and enter user calibration mode.
- When the LCD flashes, press and hold the “Hold” button for another 3 seconds to adjust the calibration value.
- The thermometer is now recalibrated.
- If the “Hold” button is not pressed within 5 seconds when the LCD is flashing, the calibration mode is automatically exited back to normal operation.
CARE & PRECAUTIONS
- Always read instructions thoroughly to ensure that you have the full benefit of all the unit’s features.
- Sterilize the thermometer probe each time before use.
- Use caution while handling the thermometer. Take care when moving the probe into position to avoid injury or damage. Always wear a heat resistant glove when touching the thermometer during or just after use. DO NOT TOUCH PROBE WITH BARE HANDS!
- Not for use as an oven or grill thermometer. Do not leave in oven or grill. LCD case temperature exposure limits are 10° to 140°F (-12° to 60°C). Do not expose stem tip to temperatures 50°F (10°C) above or below measurement range (see Specifications).
- The thermometer is not waterproof. Do not immerse the thermometer unit in liquid, or pour liquid directly on the thermometer unit, as doing so will cause damage to internal components and void the warranty. If you spill liquid on it, dry it immediately with a soft, lint free cloth.
- DO NOT wash in a dishwasher. This unit is not dishwasher safe. Damage will void warranty. Wipe clean with a damp cloth. Grease or other hard-to remove soil can be removed with a scouring pad. Do not clean the unit with abrasive or corrosive materials. This may scratch the plastic parts and corrode the electronic circuits.
- DO NOT use this thermometer in a microwave oven.
- DO NOT tamper with the unit’s internal components. Doing so will invalidate the warranty on this unit and may cause damage. Other than replacing the batteries, the unit contains no user-serviceable parts.
- DO NOT subject the unit to excessive force, shock, dust, temperature or humidity. This may result in malfunction, shorter electronic life span, damaged battery and distorted parts.

- DO NOT expose the thermometer unit to: water, direct heat, a hot surface or direct sunlight. This may cause damage to the plastic casing or the electric circuits and components inside.
ERROR MESSAGES
- “–” – Standard Error. Replace battery. If replacing batteries does not fix the error, the sensor is damaged and the thermometer must be replaced.
- “Err”- Sensor Error. Extend the probe and remove the battery. Wait 10 seconds and replace the battery. If this does not fix the error, the sensor is damaged and cannot be fixed. The thermometer must be replaced.
- “HHH” – Temperature error due to maximum temperature range exceeded.
- “LLL” -Temperature error due to minimum temperature range exceeded.
SPECIFICATIONS
Measurement Range: -40 to 572°F / -40 to 300°C
Battery: 2 AAA batteries (included)
Temperature Display: °F or °C selectable
BATTERY WARNINGS
NOTE: PLEASE RECYCLE OR DISPOSE OF BATTERIES PER LOCAL REGULATIONS.
ONLY THE DIGITAL THERMOMETER CONTAINS BATTERIES KEEP BATTERIES OUT OF REACH OF
CHILDREN
- Always purchase the correct size and grade of battery most suitable for the intended use.
- Clean the battery contacts and also those of the device prior to battery installation.
- Swallowing batteries may lead to serious injury or death in as little as 2 hours due to chemical burns and potential perforation of the esophagus.
- If it is suspected that a child has swallowed or ingested a battery, immediately seek urgent medical assistance.
- Examine devices and make sure the battery compartments are correctly secured, e.g. the screw or other mechanical fastener is tight. Do not use if the compartment is not secure.
- Always replace all batteries at the same time; do not mix old and new batteries. Do not mix alkaline, standard (carbon zinc) or rechargeable (ni-cad, ni-mh, etc.) batteries.
- DO NOT dispose of batteries in fire. Batteries may explode or leak. Batteries may pose a choking hazard. As with all small items, do not let children handle batteries. If swallowed, seek medical attention immediately. Remove the batteries if the unit will not be used for a long period of time.

The last page is no need to transfer to TEXT. OK. It is for my own reference. No recommendation. Not ads.
Just in case I need it to calibrate the digital thermocouple thermometer, I can find this page and read the instruction.
PS. I scan this piece of paper and use the online OCR service on https://ocr.space/.

